
How Can I Cut Out A Shape in Photoshop?

In Photoshop, there are two ways to cut off a shape: using the Marquee Tool or the “Subtract Front Shape” technique. Although some designers prefer the subtract front shape technique to be simpler to utilize, I think it’s crucial to be familiar with both approaches.
The UX Times Magazine is not just focused on giving designers the best user experience design tips, but also on providing overall guides to both intending designers and established designers on what is the best way to go about a design activity.
In this article, we’ll go through both techniques for cutting out shapes and let you choose which one you want to use going forward. I will carefully walk you through how to do this using photographs and other sites I recommend you check out for further practice.
Main Points
Cutting out a shape from a photograph is different from cutting out a form from another shape. The two approaches previously described can be used for the former, while the latter may call for a mix of both or the usage of other tools, such as the Lasso Tool.
Use the Refine Edge function to help you fine-tune the selected edges while cutting out intricate forms. This can be accomplished via smoothing, feathering, or improving the chosen object’s quality.
Instead of permanently erasing the portions of the picture or form you don’t want to expose right now, think about utilizing the Layer Mask tool to conceal them.
Now let’s consider the steps to achieve this:
You will probably need to follow the same procedures in whichever version you are using, whether it is for Mac or PC, because Adobe Photoshop’s user interface is constant between versions.
You can move directly to step 9 if you’re working on a file already. But let’s start by making a new file for the sake of this guide.
- Open Adobe Photoshop Studio on your computer by clicking Create New.
- Choose the size of the canvas that you desire. Check out this video for instructions if you’re not sure how to customize your workplace.

- To draw a shape, use the Shape Tool from the Tools Panel. Toggle Shift U to choose a certain shape.

- Drag your pointer over it to create the form on your canvas. Holding Shift while dragging may help you create an ideal form while sketching an ellipse or square. As a starting point, let’s use a rectangle.
- To align the form, drag it about the canvas’s center after switching your cursor to the Move Tool by using the V key on your computer.

- To make the cut, draw a second shape over the original one. We should utilize any of the custom shapes for the purposes of this guide. By right-clicking the Shape Tool and choosing Custom Shape at the bottom of the drop-down menu, we can choose a custom shape.
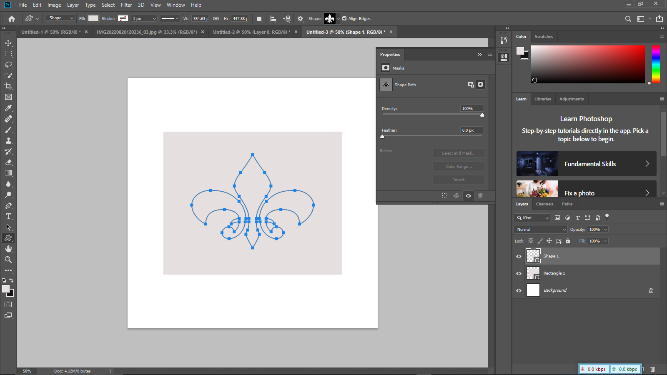
- There is now a new box in the Options Panel, as you can see. For the sake of this guide, choose the box and utilize the fleur-de-lis form.

- Draw the form over the rectangle and then alter its color to make it more noticeable.

9. Select both forms in the Layers Panel, then duplicate them. To duplicate, just hit Command J on a Mac or Ctrl J on a Windows computer.
Method 1: How to Cut Out A Shape in Photoshop Using the Marquee Tool.
- From step 9 above, pick Rasterize Layer from the menu by right-clicking on the duplicated rectangle in the Layers Panel.

- Holding down the Ctrl or Command buttons while selecting the duplicate Fluer-de-lis form on the Layers Panel will highlight it.

- The rectangle should be selected in the Layers Panel, and then the cursor should be moved across the canvas.
- To use the Marquee Tool, press M on the keyboard. Select Layer Via Cut by performing a right-click on the canvas. There is a new layer in the layer panel, as you can see.

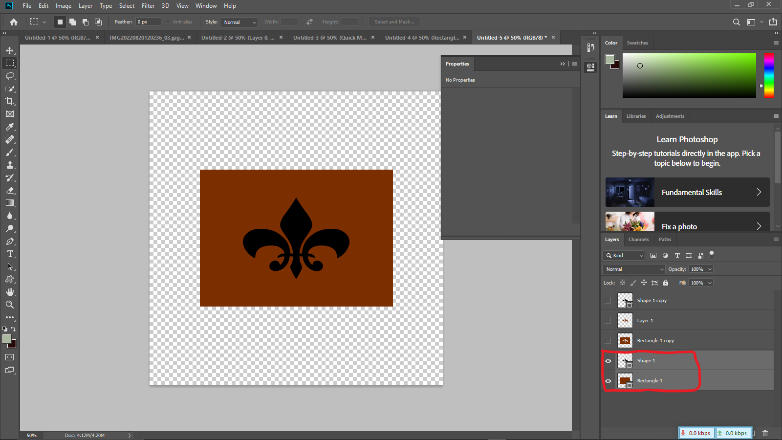
- To observe the outcome of the cut-out effect, deselect all other layers besides the copied rectangle shape, including the layer just added.
Method 2: How to Cut Out A Shape in Photoshop by Subtracting Front Shape.
- Select the remaining two original layers of the rectangle shape and the Fluer-de-lis form to continue from step 9 above.
- Choose the Layer button from the Menu Bar.

- Your cutout will be ready once you remove the Fluer-de-lis shape from the rectangle by selecting Subtract Front Shape from the drop-down menu under the Combine Shapes option.

The good news is that there is a lot that can be done with cutting out shapes, even though it might need more accuracy and skill. See this YouTube tutorial from Lemon Paper Lab for further experience cutting out shapes in Adobe Photoshop and examples of their application.
Frequently Asked Questions
These are responses to some of the most typical queries designers have about cutting off a form in Photoshop.
How can I conceal a shape’s pieces if I don’t want to permanently delete or erase them?
To remove vector shapes or strokes, use the Eraser Tool. Instead, think about employing Layer Masks. Layer Masks provide non-destructive editing by allowing you to hide or reveal certain areas of a layer without removing the original feature.
Can Photoshop be used to create forms with translucent backgrounds?
Yes. When your form is prepared, check the Layers Panel’s opacity level drop-down menu and choose a range that is less than 100%. As you go down, the image becomes more transparent.
Concluding Remarks
The outcome is what distinguishes the two ways of cutting out a shape. You may keep your item as a vector file after you Subtract Front Shape, allowing you to scale it to the proper size and quality. However, utilizing the Marquee Tool merely rasterizes your item into pixels, which may have an influence on quality depending on the resolution you select.
A certain amount of creativity is required to use Photoshop as a design tool, and developing this degree of creativity entails investing quality time in practice. You will earn knowledge and insights that can be used when utilizing other design tools by using the tools and practicing with them.


Comments
Post a Comment
Please, leave us a message. We respond as soon as possible